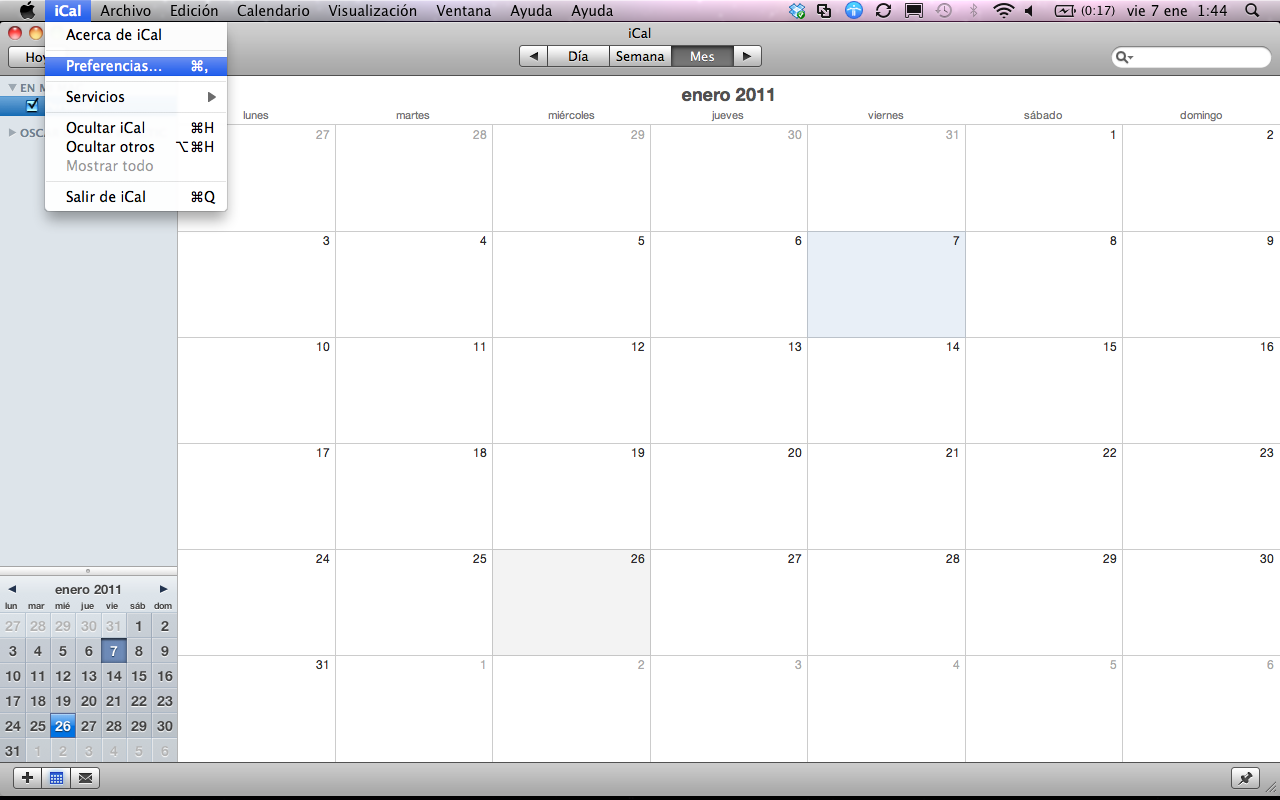
1. To configure our Zimbra calendar we will first go to iCal by accessing the Preferences… of the program:
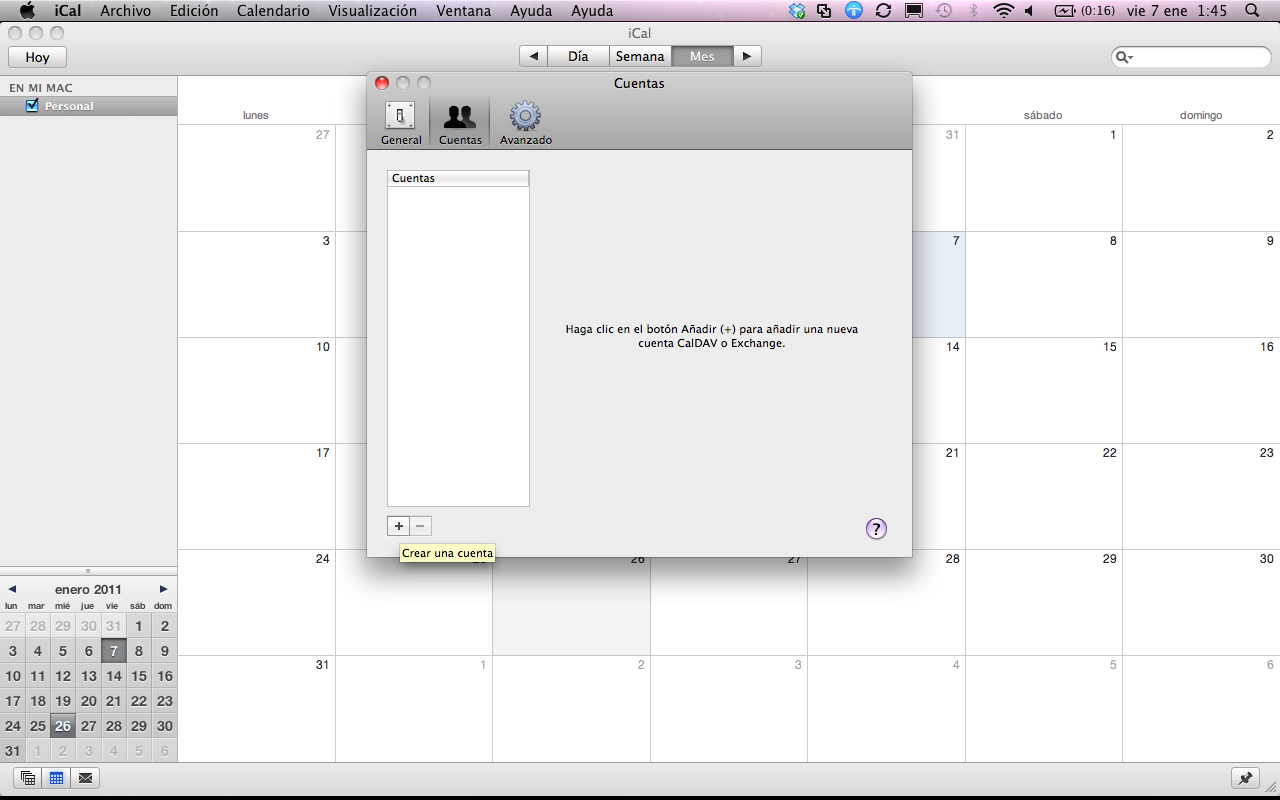
2. Here we can add the calendar accounts that we want to synchronize, by pressing the “+” button:
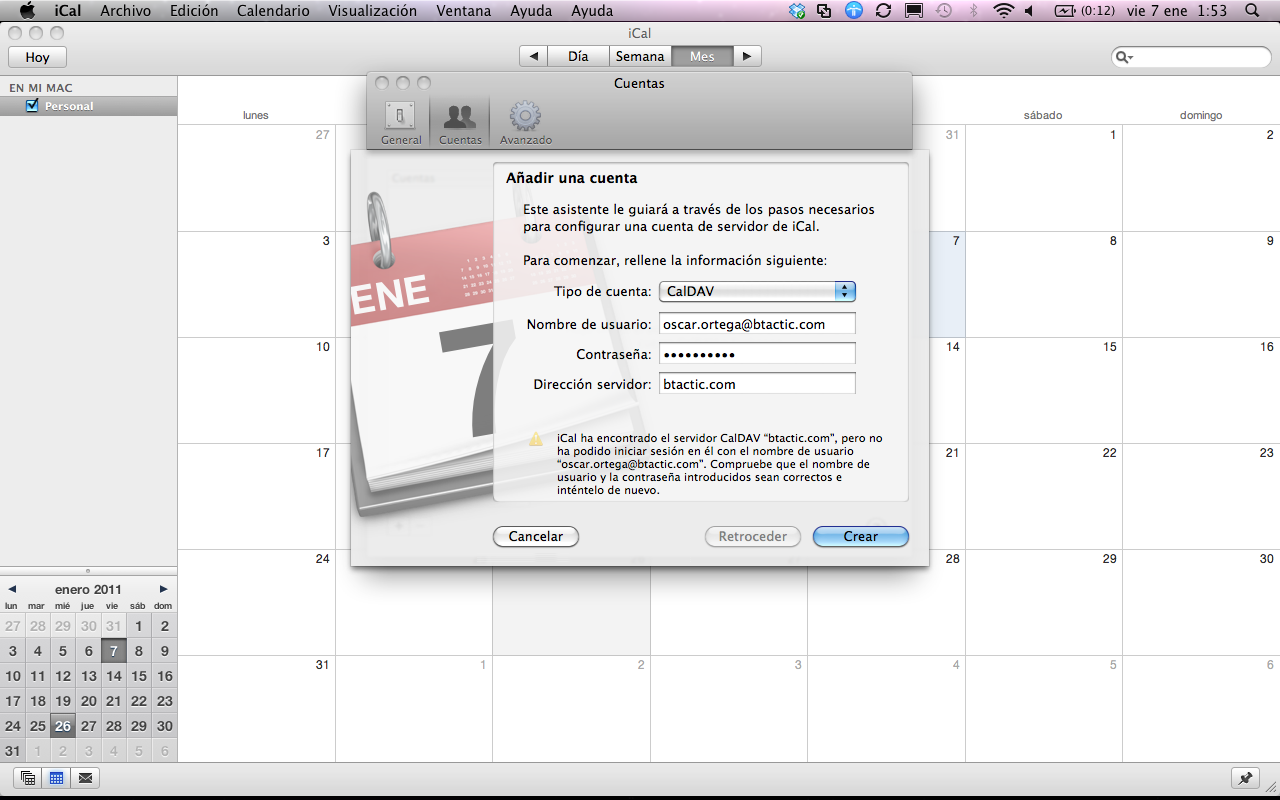
3. To add our Zimbra calendar we will select in Account type: CalDAV. We also introduce our Username: (email), Password and the Address of the server: (in case of ignorance we will contact our Zimbra provider).
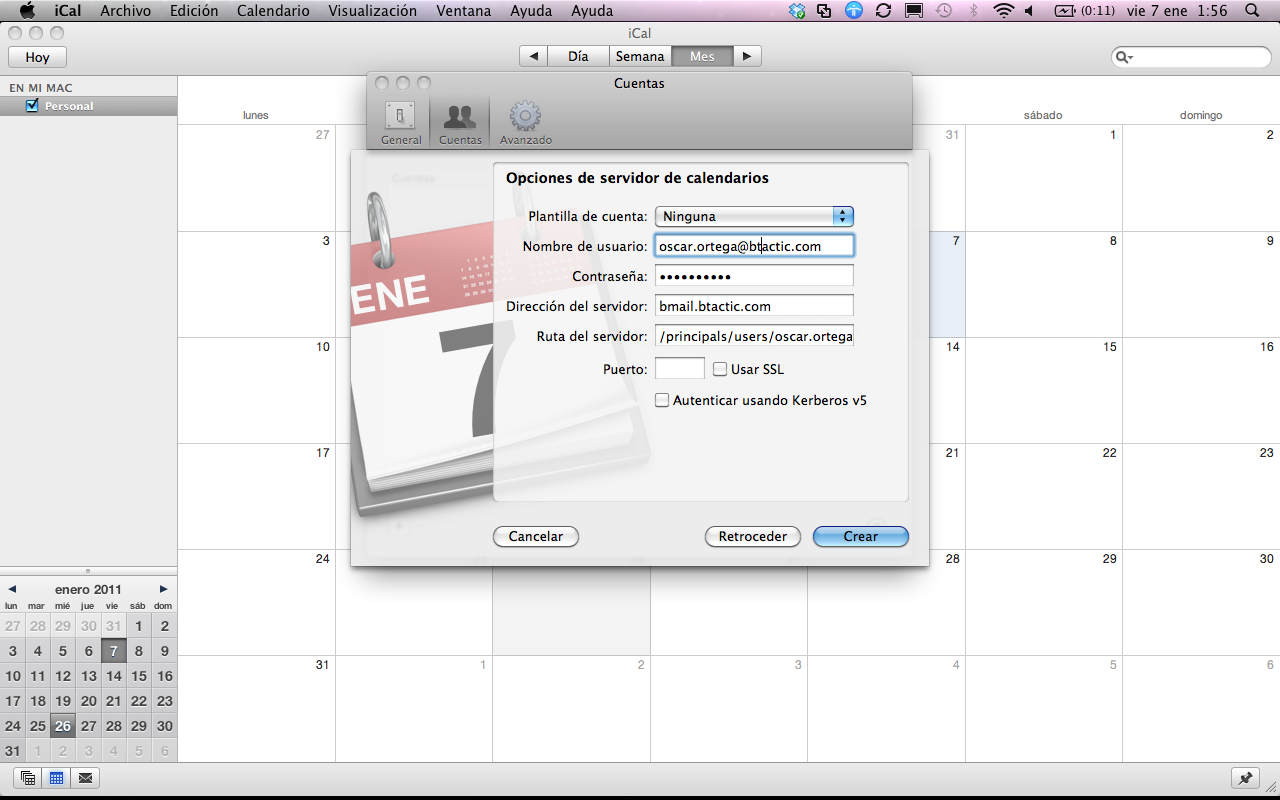
4. Once entered, a screen will appear to fill in the advanced data. We must activate the Use SSL and Port 443 check-box here (it usually appears by default):
5. Once these parameters are configured, we can create the account and it will appear in our Mac iCal calendars.