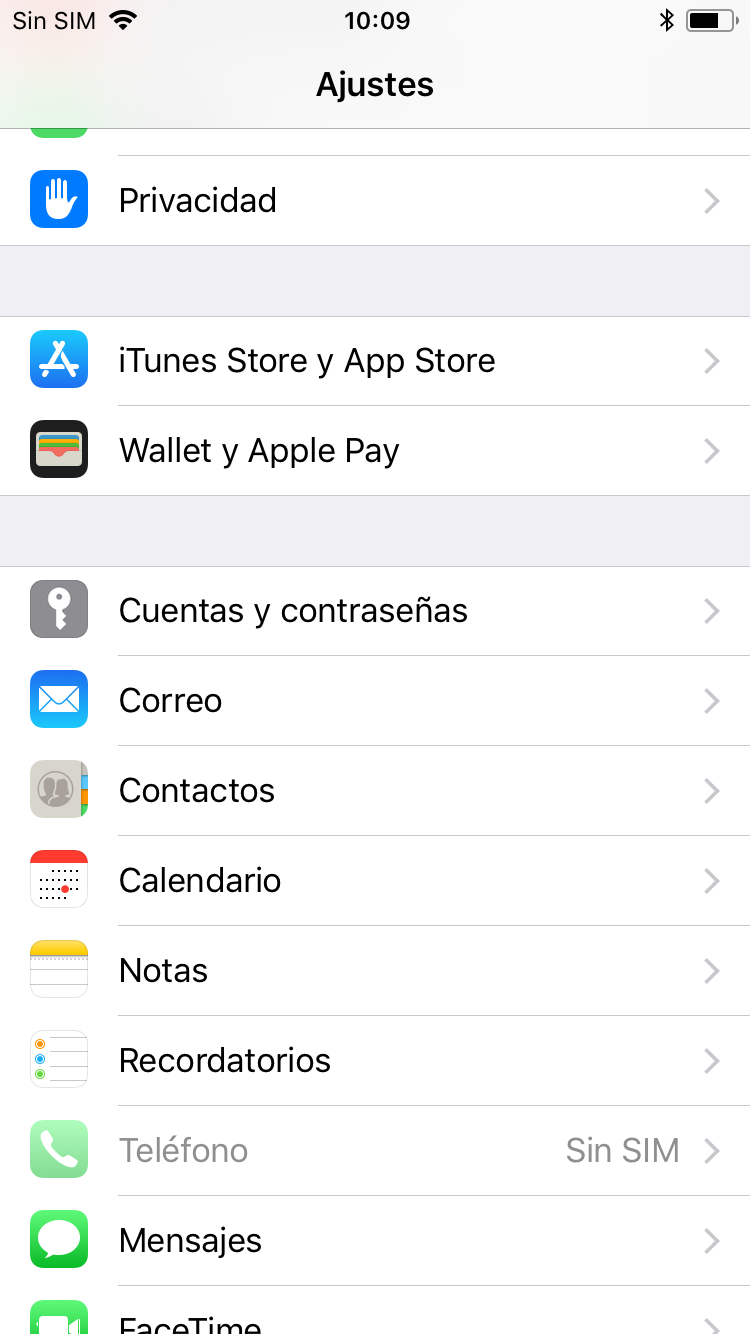
1. To configure IMAP mail, we will first go to Settings and look for the Accounts and passwords list (names may vary depending on the version of iOS).
 |
 |
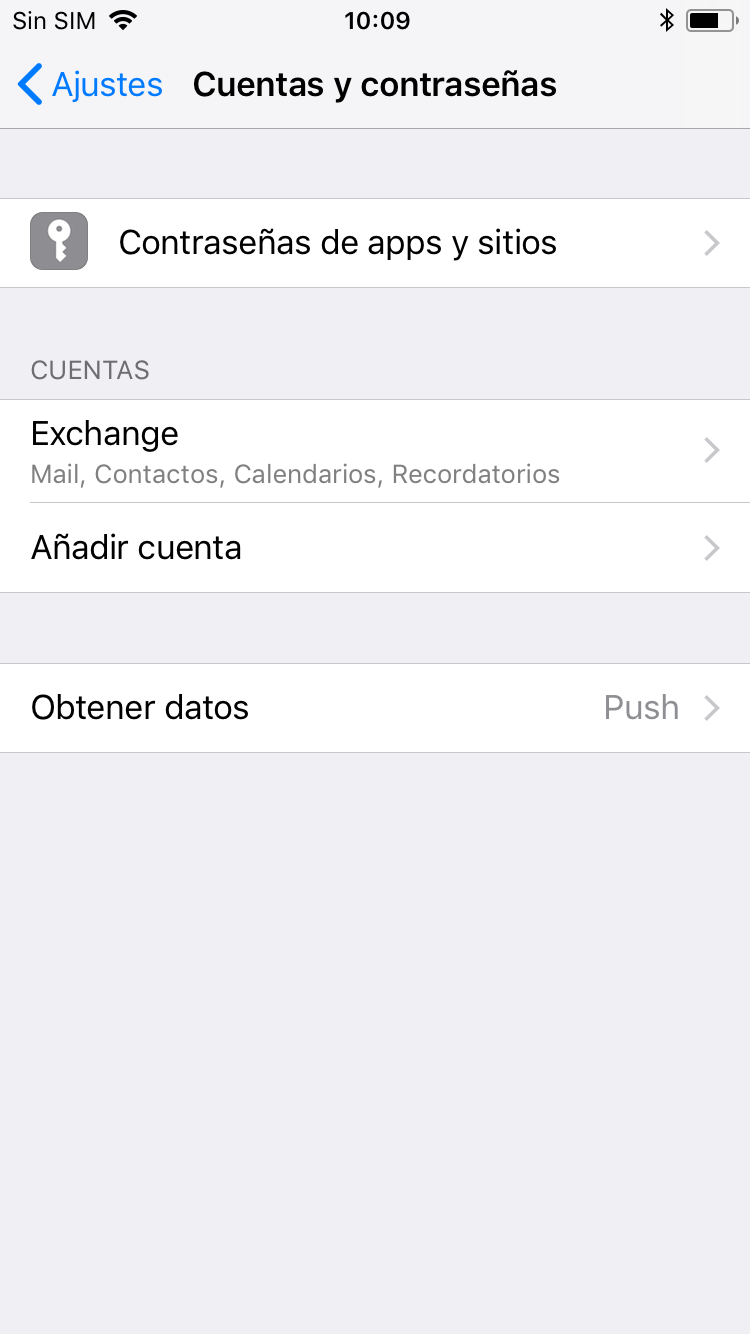
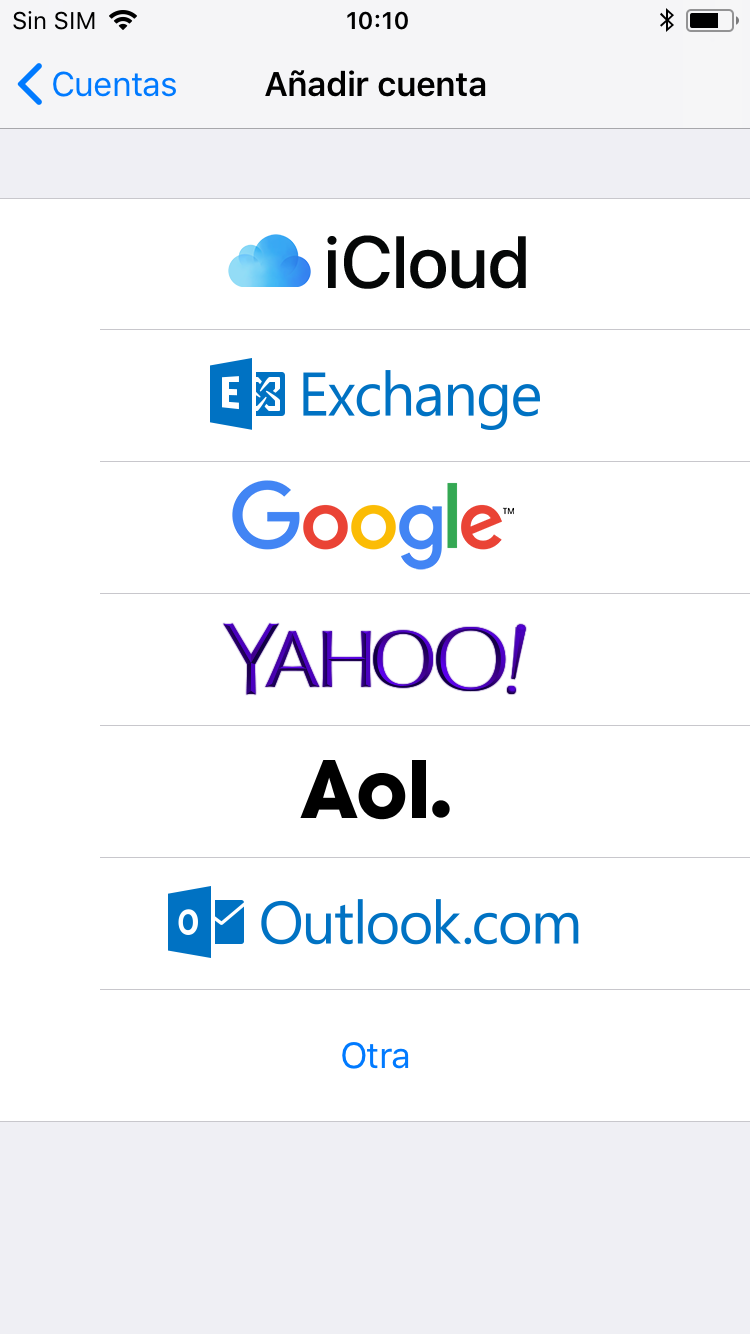
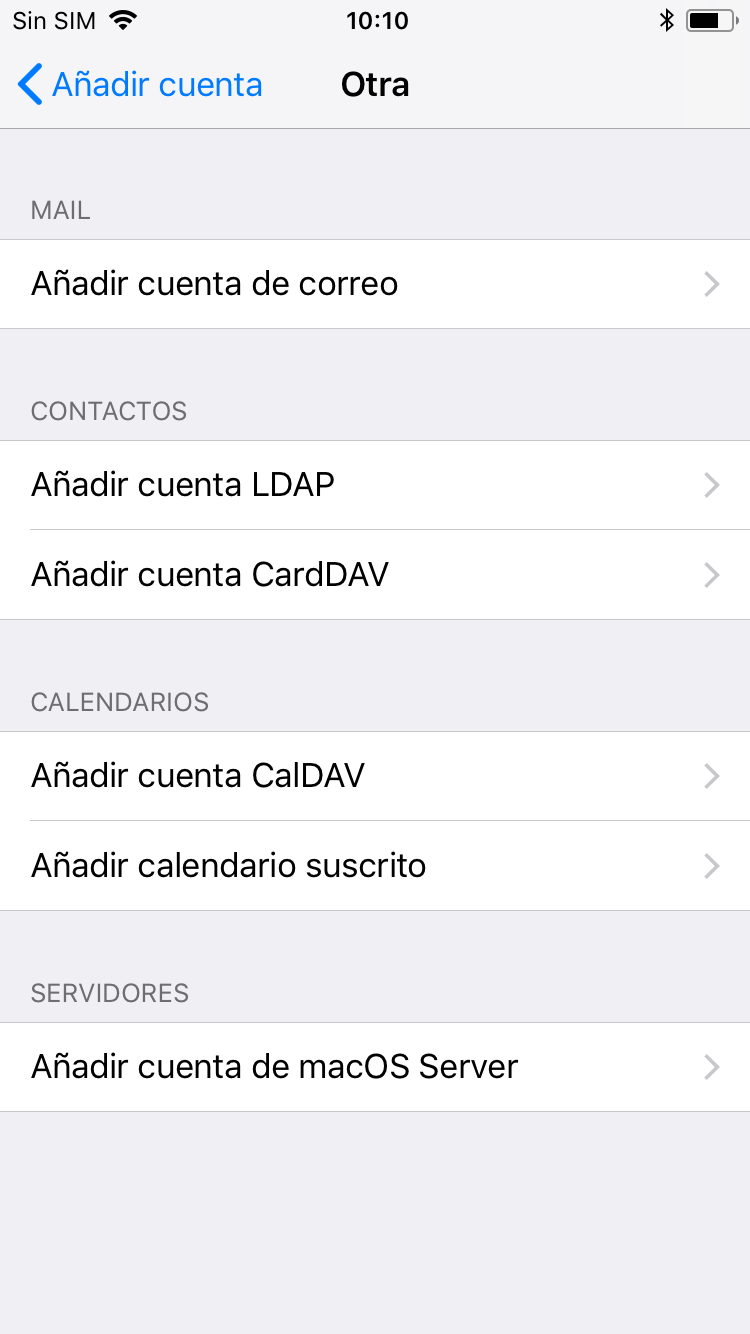
2. Press, first, Add account, and then Other. This will open a list with different account types. We will press the first option, Add mail account.
 |
 |
 |
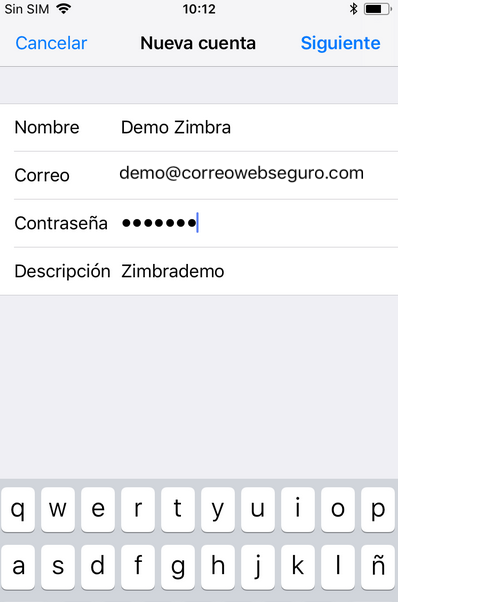
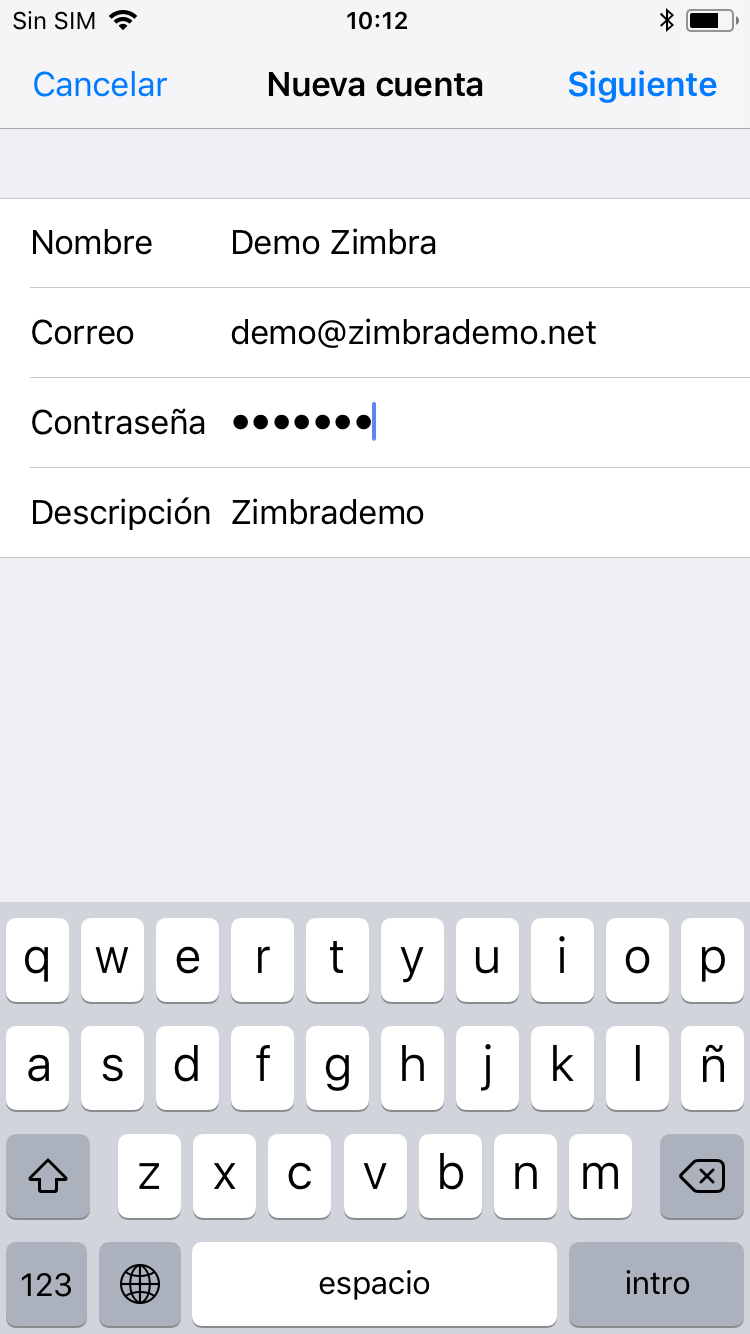
3. Next, a screen with fields to be filled will open. First, we will introduce a name to differentiate it from other accounts that we have in this device. Second, we will enter the email address. Third, the password. Finally we will put the description to our liking (it does not matter).
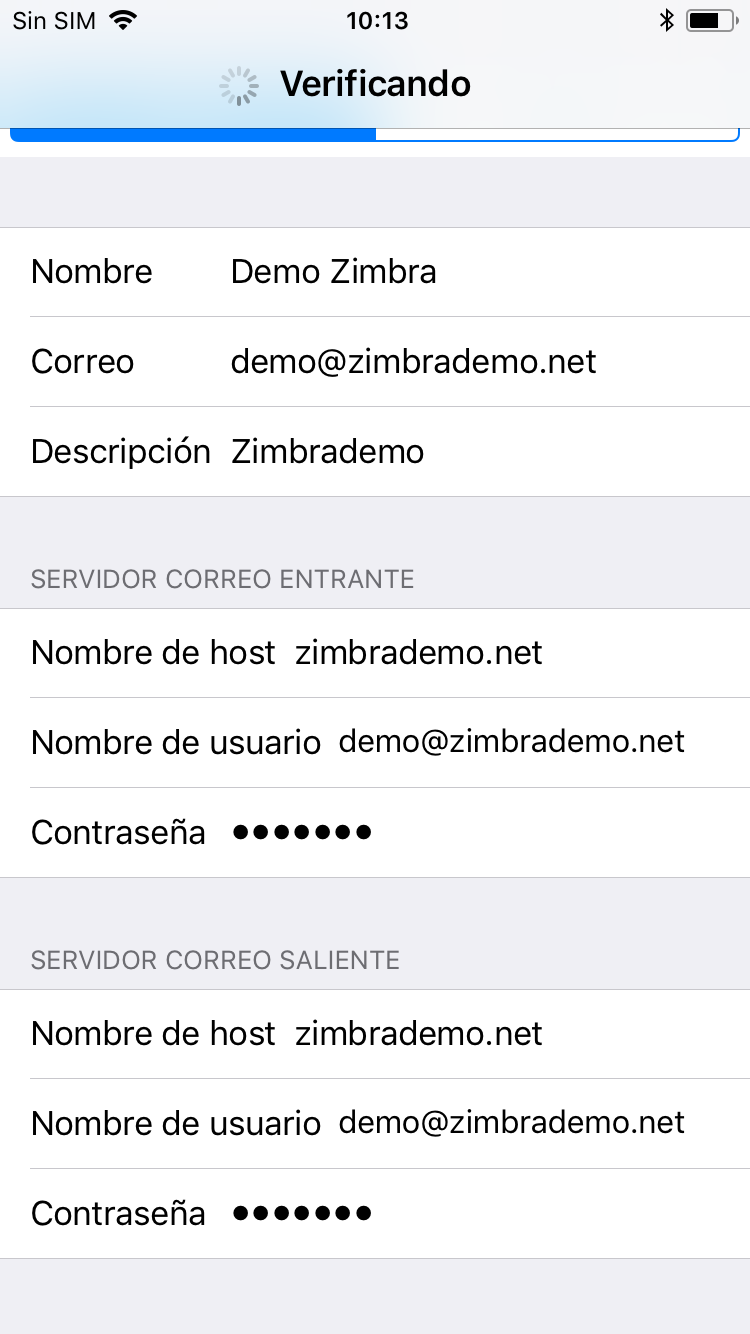
4. We will continue with Next and we will open a screen similar to the previous one, with fields to fill out and others already filled in through the information previously introduced. We will add our server in Host name (in case of ignorance we will contact our provider). Finally we will finish filling the other spaces with the same information that we have put: server, address and password.
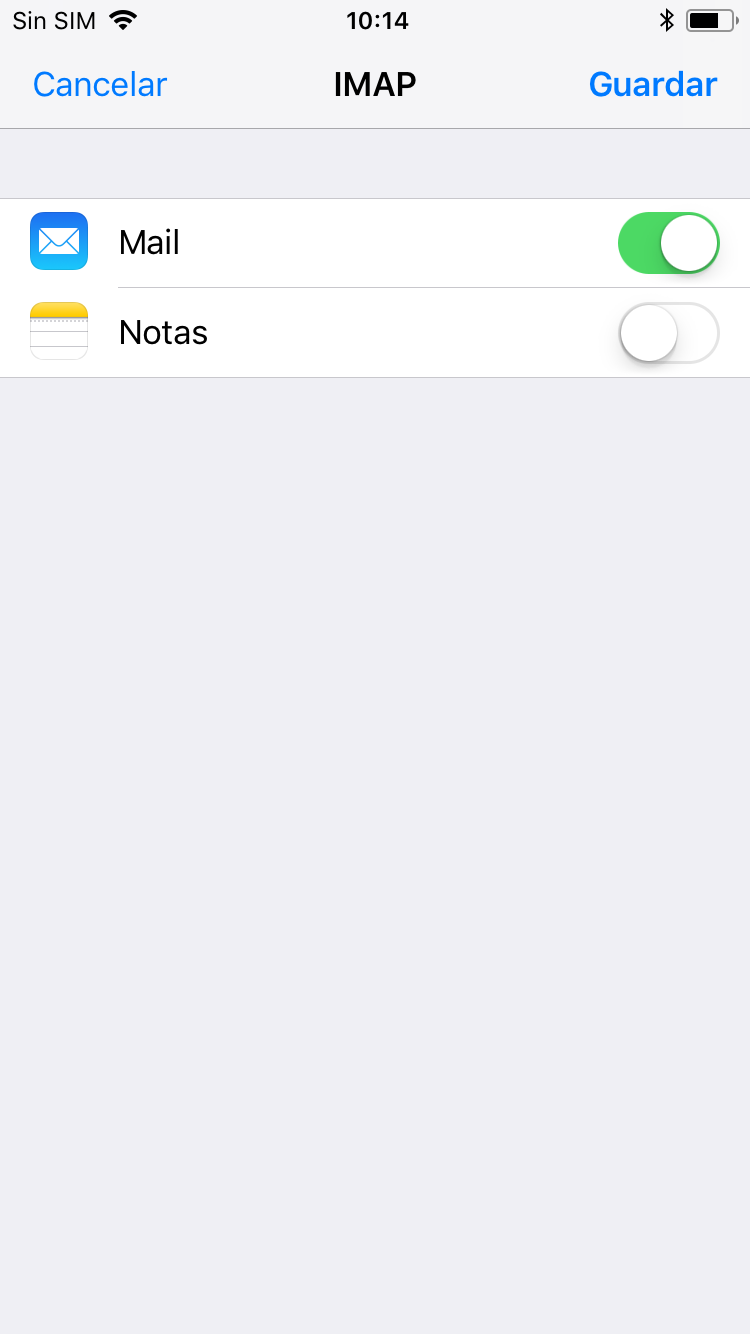
5. Once all the fields are filled out, we will be asked to synchronize the email and the notes (this will create a folder within Zimbra that will synchronize them as sent emails). We will select them according to our needs.
6. Finally, we will go to our default mail application and observe how a new mailbox with the name we have specified during the configuration will have been added.
