1. To configure accounts in Zimbra Desktop we will go first to the Setup panel located in the top right.
2. Once inside, we will see the accounts that we have created, and next to a tab that we will press ADD A NEW ACCOUNT.

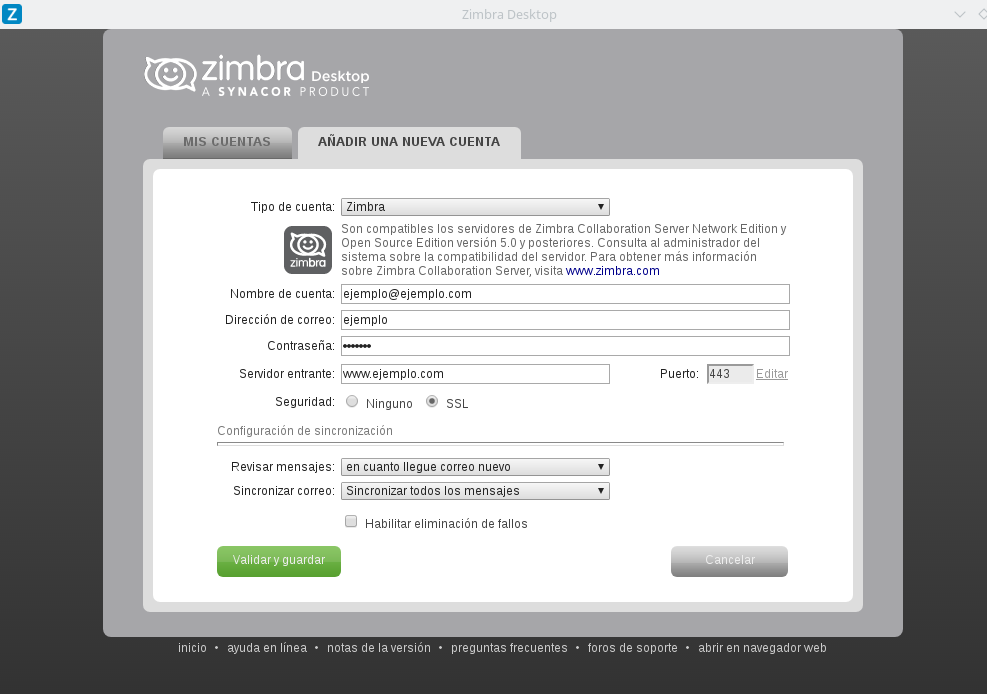
3. Open the drop-down and select Zimbra. Next we will fill in the fields that will appear:
- Account name: we will introduce a name to identify it among our Zimbra Desktop accounts.
- Email address: we will enter our COMPLETE email address.
- Password: we will enter the one of our account.
- Incoming server: we will introduce our server (contact your Zimbra provider in case of ignorance).
- Security: we will mark SSL.
- Port: 443 (appears by default when dialing SSL)
4. When finished press Validate and save.
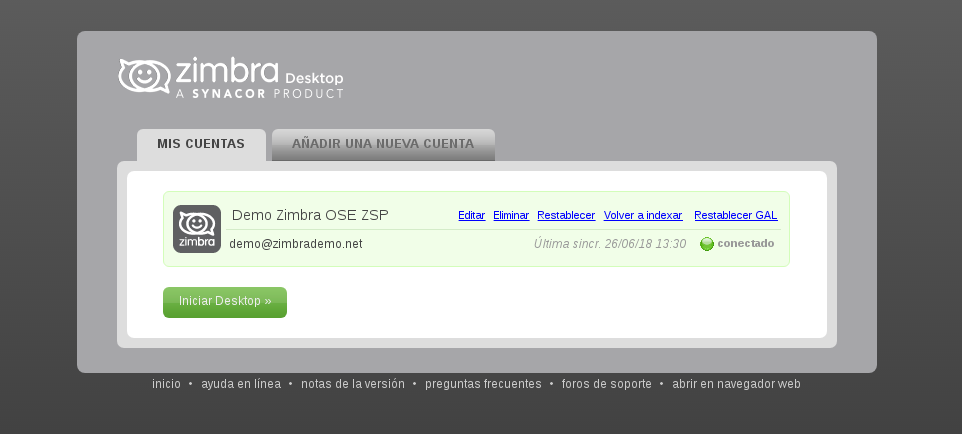
5. Finally we will find the following screen, in which we will press Start Desktop. From this moment we can start using Zimbra Desktop with our Zimbra account. NOTE: If this is the first time we synchronize this account, it may take a little longer than usual, depending on our computer and Internet connection.