Advanced open Workflow
Advanced Open Workflow (AOW) is a module for SuiteCRM, which allows users to create custom workflow processes. This module allows users to activate various system actions depending on the conditions of any SuiteCRM module.
Create a workflow process
You can create workflow processes by navigating to the ‘WorkFlow’ module within SuiteCRM. Click on the ‘Create Workflow‘ button in the action bar to start creating the process. The first panel allows users to configure the workflow process.
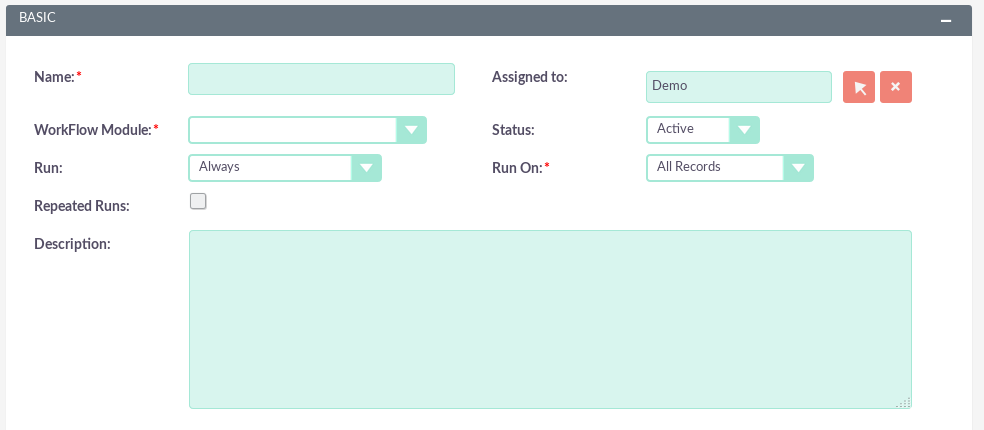
This allows you to specify the following.
– Name: the name of the process.
– Assigned to: the assigned user of the workflow process.
– WorkFlow Module: drop-down list of all the modules found in the SuiteCRM instance. This is the module with which the workflow is executed. For example, when you create / edit an account.
– Status: active or inactive. Only active processes will be executed.
– Run: always, when saving or in the programmer.
– Run on: all records, modified records or new records.
– Repeated Runs: if checked, the process will continue running again and again. Ideally, this should only be verified if one of the specified Actions denies (or will lead to the denial) of one of the specified Conditions.
– Description – A description of the process.
Conditions
Add conditions
Once configured, you can add conditions to a workflow process using the conditions panel. This allows users to specify the criteria that should trigger the actions in the workflow.
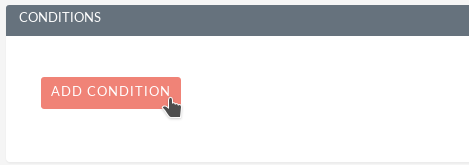
To add a Condition Line, you must click on the ‘Add condition‘ button.
NOTE: You must select your WorkFlow Module in the first panel before adding a Condition Line.

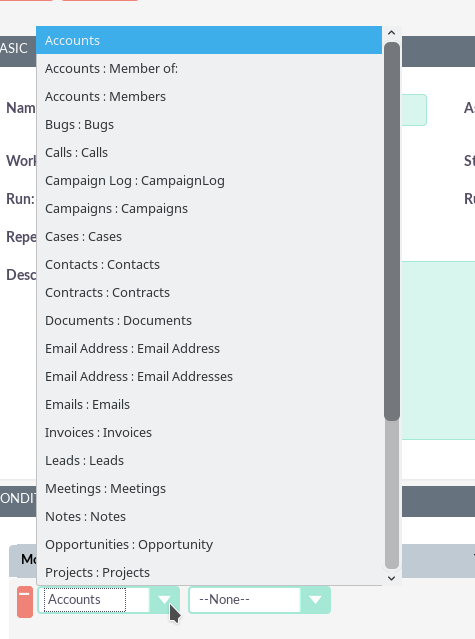
You can have an unlimited number of Condition Lines. To add another line, click on the ‘Add condition‘ button again and it will appear. On the line, you will have four fields; Field, operator, type and value.
Field and operator
The field is a drop-down menu that is automatically populated with all the fields that are in the WorkFlow Module.
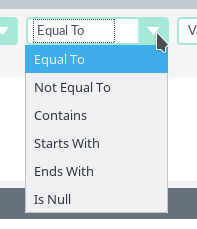
The selected field will determine the available options for Operator and Type. If the field type is not a number or date, the available operators will be ‘Equal to‘ or ‘Not equal to‘. For the number and date fields you can also choose between additional logical operators; ‘Less than‘, ‘Greater than‘, ‘Less than or equal to‘ or ‘Greater than or equal to‘.
Types of conditions
You can specify workflow processes to trigger in different types of conditions. These are the following:
– Value: used to directly compare the field with a value. The type of value offered is dynamic for the field type of the selected field. For example, if the field type is drop-down, the type of value field will be the same drop-down list.

– Field: used to act in a workflow process when a field is compared to another field in the record.

– Multiple: you can select if the field is a drop-down menu / multiple selection. This allows users to specify multiple values for the workflow action.
– Date: this allows you to specify the workflow that will occur after / before a quantity of time from another date field or ‘Now’. For example, when the start date of a call is ‘Now + 10 minutes’. This can only be used when the field is a date field. The amount of time before or after the date can be specified in minutes, hours, days, weeks or months.

Deleting conditions
You can remove condition lines by clicking on the ‘-‘ button on the left side of the condition.

Behavior
Add actions
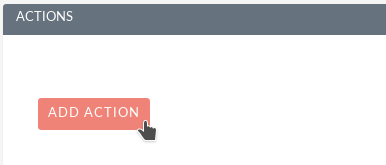
The actions are defined in the third panel. These specify what events should occur when the conditions are met. You can add an action by clicking on the “Add action” button.
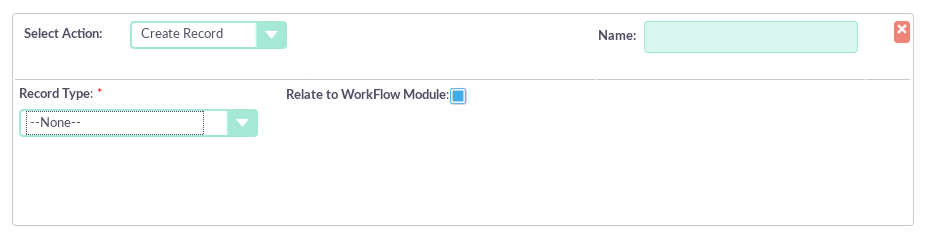
This will bring up the action line.

From the Action Line you can select Action and give it a Name. The available actions are; ‘Create record‘, ‘Modify record‘ and ‘Send email‘. You can specify an unlimited number of actions for each workflow process.
Create record
If you select ‘Create record‘, you will be asked to select a Record type. This is the type of registry module you are looking to create.
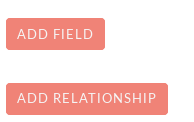
Once selected, you can add fields or relationships to this record using the ‘Add field‘ and ‘Add relationship‘ buttons.
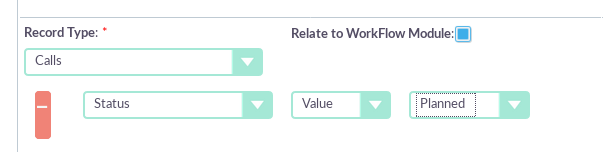
When adding fields, the first drop-down menu on the line will be completed with all the fields in that module. The second drop-down menu allows you to specify how the value will be obtained for that field. For most of the cases, the options are the following:
– Value: this will allow you to enter the value directly using the same type of field as the selected field.
– Field: This will make the field have the same value as a field found in the WorkFlow Module.
– Date: can only be selected if the field is a date field. This will allow you to specify the value as an amount of time after / before another date field or ‘Now’.
Selecting the ‘Assigned to‘ field also gives you more options. In addition to value and field, you can assign a user as follows:
– Round Robin – This will select each user per turn.
– Less busy: This will select it with the least number of records assigned for that module.
– Random: will select a random user.
NOTE: For each of the above options, you can choose if you want to be selected from among all users or users of a specific role. If you have the SecuritySuite module installed, you can also choose if you want to be selected from among all users of a particular Security Group or all users of a particular security group with a particular role.
When adding relationships, you must select the related module from the drop-down list and then select the record with which the new record will be related.

NOTE: You must select the module related to the arrow button: the automatic completion in the text field is not currently developed.
Modify record
This provides the same functionality as ‘Create record‘, but instead of creating a new record you are modifying the record that meets the conditions of the workflow process. With this action you can modify any field that is inside the record or you can add a relation to another record. This is completed in the same way as ‘Create record‘, except that you do not need to specify the Record type.
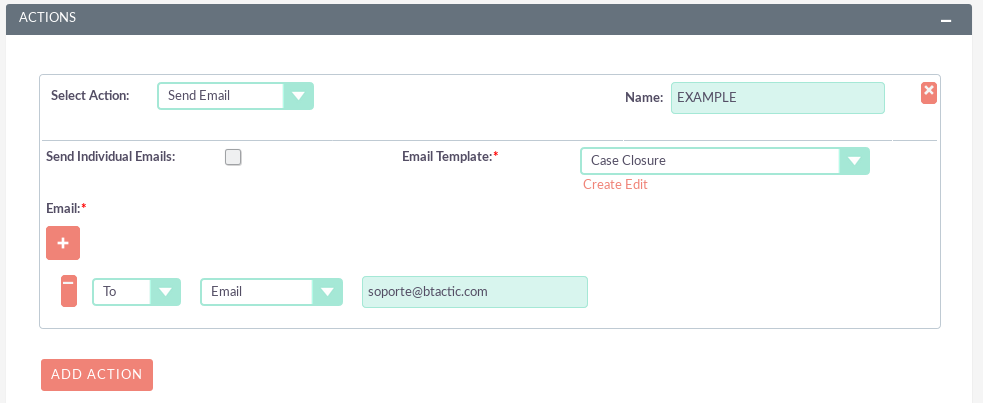
Send e-mail
The ‘Send email‘ action allows users to create workflow processes that will send an email based on a template to people. Using this action there are four different types of recipients.
– Email – this will send an email to a specific email address. You must specify the email address and the email template.
– Record email – send an email to the primary email address specified in the registry that activated the workflow process. This can only be used if the record has an email field such as Accounts and Contacts. For this option, you only need to specify the template.
– User – will send the email to a specified email address of the users. You must specify the recipient’s user and the email template.
– Related field – will send an email to the main email address specified in a register of related modules. In this case, you must specify the related module (From a drop-down list) and the email template.

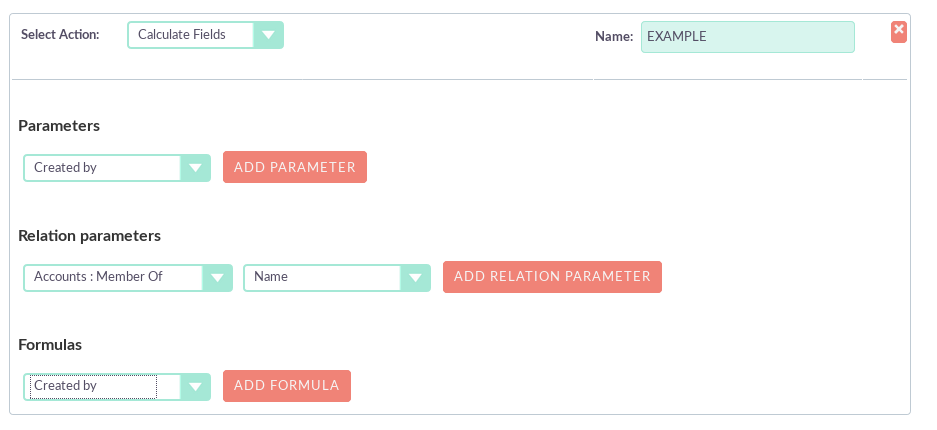
Calculate fields
If you select ‘Calculate fields‘ in the Action drop-down menu, the Calculate fields user interface will load after one second and looks like the next image.
Calculate fields – Add parameters
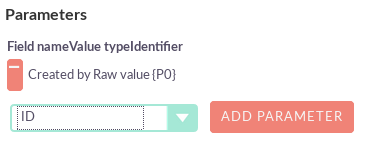
It is possible to add parameters to the formulas using the drop-down menu in the Parameters section of the Calculate Fields user interface. The drop-down menu contains all the fields (basic and custom) that belong to the module selected in the basic fields section.
To add a parameter, select the field from the drop-down menu and click on the Add parameter button. After this action, a new line appears in the parameter table with the name of the field and the given identifier.
For some fields (drop-down lists and multiple selections) an additional pull-down menu appears where the user can select whether the unformatted value or the format should be used in Calculated Fields. The raw format means the value that is stored in the database and the formatted value means the label for that database value.
To remove a parameter from the table, simply click on the ‘-‘ button in the parameter row. Note that if you delete a parameter, all identifiers are recalculated, so the identifiers could change by fields.
The identifier is used to reference this field when the user creates the formula. For example, all appearances of identifier {P0} will be replaced by the name of the account in the formula. All parameters are like {Px} where x is the sequential order of the parameter. The amount of the parameters is not limited.Calculate fields – Add relation parameter
The relationship parameters are very similar to the regular parameters, the only difference is that the user first selects an entity that is in a one-to-one or one-to-many relationship with the real entity.
To add a relationship parameter, first select the relation, then select the field of the connected entity and press the Add relation parameter button. After this action, a new line appears in the table of relationship parameters with the name of the relationship, the name of the field and the identifier provided.
As for the parameters of some fields of relationship parameters (drop-down menus and multiple selections), an additional drop-down menu appears where the user can select whether the raw value or the format should be used in Calculate fields.
To remove a relationship parameter from the table, simply click on the ‘-‘ button in the row of the relationship parameter. Note that if you delete a relationship parameter, all identifiers are recalculated, so the identifiers could change by fields.

The identifier is used to reference this field when the user creates the formula. For example, all identifier appearances {R0} will be replaced by the user name of the creator in the formula. All relationship parameters are like {Rx} where x is the sequential order of the relationship parameter. The amount of the relationship parameters is not limited.
Calculate fields – Create formula for a field
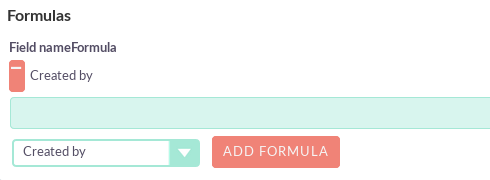
In the Formulas part of the user interface, the user can add formulas for the fields of the real entity.
To add a formula, select a field from the drop-down list first and then press the Add formula button. After this action, a new line appears in the formula table with the name of the field and the place for the formula.
To remove a formula from the table, simply click on the ‘-‘ button in the row of the formula.
The formula is a text box where the user can write the formulas. The module evaluates the formula in the given time (in saving, in the execution of the programmer or in both) and completes the selected field with the evaluated value.
The formula can contain any text (with full support UTF-8), but only the parts of the function are evaluated (functions with parameters between ‘{‘ and ‘}’). For example, with the parameters added in the previous sections, if we fill in the formula as: Account {P0} created by user name {R0}, the description field will have the following value after saving: Account My account created by name of MyUser user (which implies that the name of the account is My Account and the username of the creator is MyUser).
The Calculate Fields has many built-in functions that allow the user to build complex formulas to achieve several objectives. These functions are described in the following section.
Calculate fields – Usable functions
As mentioned above, all functions are wrapped between signs ‘{‘ and ‘}’, and look like {functionName (parameter1; parameter2; …)}. The counting of the parameters is different for the different functions. The module evaluates the functions and changes them with its result in the formula.
The functions can be integrated with each other (using the result of a function as a parameter for another function) as in this example:
{power ({subtract ({divide ({add ({multiply (10; 2)}; 12)}; 8)}; 1)}; 2)}
This function is the formal aspect of the following mathematical expression:
(((((10 * 2) + 12) / 8) – 1) 2
Thanks for the great explanation.
Do you know how a record will not affected by workflow anymore as soon as the set conditions are true?
e.g.: my workflow will change the value of custom field status_c into “done” if field somefield_c is not null
this works great so far, but once i have to change the status_c field back to “open” the workflow triggers again and set it back to “done”.
I have repeated runs checked, because the field somefield_c will be filled by database synchronization (so i cant use “Only on save”)