| Name: The one you want |
WorkFlow Module: Opportunities |
| Status: Active | Execute: Only when saving |
| Run on: All records |
Repeated Runs: Marked |
We DO NOT create any condition, since we would like WorkFlow to run at all opportunities.
Now, add an action and select Calculate fields from the drop-down menu.
Next, add two Opportunity fields as parameters. First, select Opportunity quantity and add it as a parameter (it will be {P0}) then select the option and the raw value option from the data type drop-down menu and add it as parameter two (it will be {P1}). It is not necessary to add any relational parameter for this formula.
Now, add a formula for the monthly field and complete the text box with the following formula:
{divide ({P0}; {P1})}
Save WorkFlow and create a new opportunity:
As you can see, we do not even add the monthly field to Edit View, because we do not want to force the user to perform calculations. Save the opportunity and check the results in Detail View.
Deleting actions
You can click on the X button in the upper right part of the Action.
Deleting field lines and relationship
You can make field lines and click on the button – on the left side of the Action.

Process audit
Advanced Open Workflow allows users to audit their processes. In the details view of each WorkFlow record, there is a subpanel called Processed flows. Lists all workflow processes that have been executed, including details about the record that the flow activity, its status, and the date it was created.
You can view this information at a higher level by clicking on the View the process account button within the module’s action bar. This shows all the processes that have been run for all WorkFlow records.
Tutorials
Clients to the list of objectives
This tutorial shows you how to create a workflow to add customer accounts to a list of goals when you create or modify the record.
1 – Start by navigating to the WorkFlow module and click on Create workflow from the action bar.
2 – Give your workflow a name like Fill list of objectives.
3 – Offer Accounts like the WorkFlow Module.
4 – Make sure that the repeated executions are NOT selected and that the status is active. You can optionally change Assigned to and add a Description.
Conditions
1 – Create a new status line by clicking on the Add condition button.
2 – Select Type in the Field drop-down menu.
3 – Keep the operator as Equal to and the type as Value.
4 – In the Value drop-down menu, select Customer.
Once these steps have been left, the Content panel should look like this:

Behavior
Create a new action by clicking the Add action button.
1 – Select Modify record from the Select action drop-down list.
2 – Using the Name field, assign a name to the action as Add to objectives list.
3 – Add a relationship line by clicking on the Add Relationship button.
4 – A drop-down menu will appear above the Add Relationship button. Select the relationship of this drop-down box. In this case, we are looking for lists of objectives: list of prospects.
5 – This will populate the rest of the line. Click on the arrow button next to the field to select your list of objectives.
Reminder of cases
This tutorial shows you how to create a workflow to notify the assigned user and then a particular administrator user when an open case has not been updated / modified within two days.
1 – Start by navigating to the WorkFlow module and click on Create WorkFlow flow from the action bar.
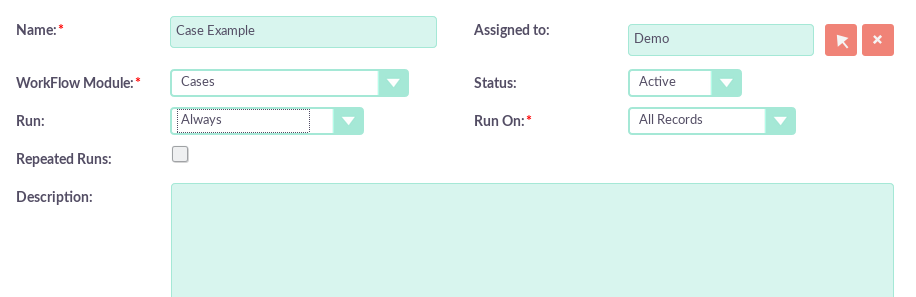
2 – Give your workflow a name such as Case.
3 – Select Cases as the WorkFlow Module.
4 – Make sure that the repeated executions are NOT selected and that the status is active. You can optionally change Assigned to and add a Description.
Once these steps have been left, the first panel should look like this:
Condiciones
1- Cree una nueva línea de estado haciendo clic en el botón Agregar condición‘
2 – Seleccione Fecha de modificación del campo desplegable.
3 – Cambie el operador a Menor que o igual a y el tipo a Fecha
4 – En los campos Valor, selecciona Ahora, –, 2, Días en orden.
Una vez que estos pasos han sido completados, el panel de Contención debería verse así:
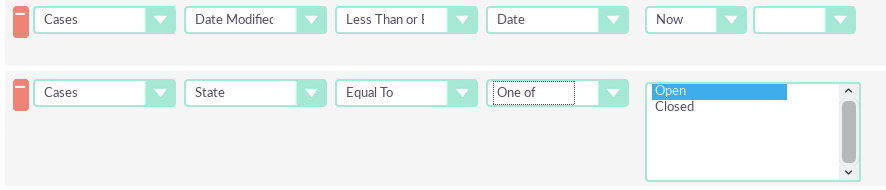
Conditions
1- Create a new status line by clicking on the Add Condition button
2 – Select Date Modified from the drop-down field.
3 – Change the operator to Less than or equal to and the type to Date
4 – In the Value fields, select Now, -, 2, Days in order.
Once these steps have been completed, the Containment panel should look like this:
![]()
1 – Repeat step 1.
2 – This time, select State from the drop-down field.
3 – Keep the operator as Equal to and change the Type to State.
4 – In the field Selection value State, value that means an open case.
Once these steps have been completed, the Containment panel should look like this:
Behavior
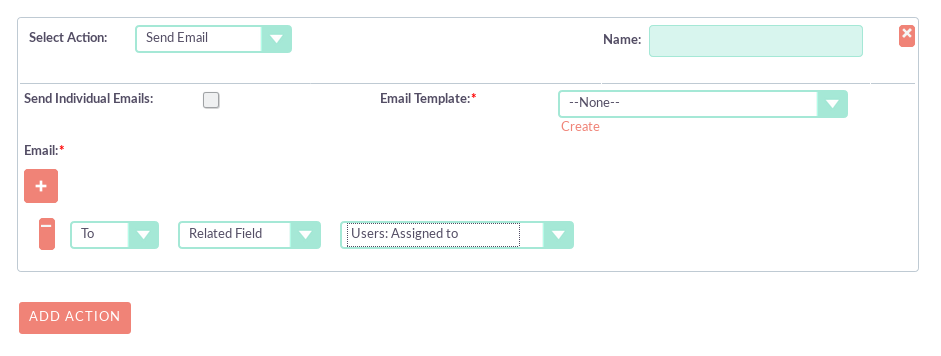
1 – Create a new action by clicking on the Add action button.
2 – Select Send e-mail from the Select action drop-down list.
3 – Give the action and give it a name.
4 – In the email line, select Related field from the first drop-down menu, Users: Assigned to the second drop-down menu and an email template from the third drop-down menu.
Once these steps have been left, the first panel should look like this:
1. Repeat steps 1, 2 and 3, but change the name of this action to Manager Escalation Email.
2. On the email line, select User and then from whom you should receive the email. Select an email template from the third drop-down menu.
3. When finished, click Save to create your workflow.
Web lead tracking
This tutorial shows you how to create a workflow process to assign Web to a particular user from within within SuiteCRM. This user was chosen by round robin. The workflow process also establishes a follow-up call for a day after the potential Customer is created.
NOTE: You can change the Sales role that is in your own system.
Prepare
1 – Start by navigating to the WorkFlow module and click on Create workflow from the action bar.
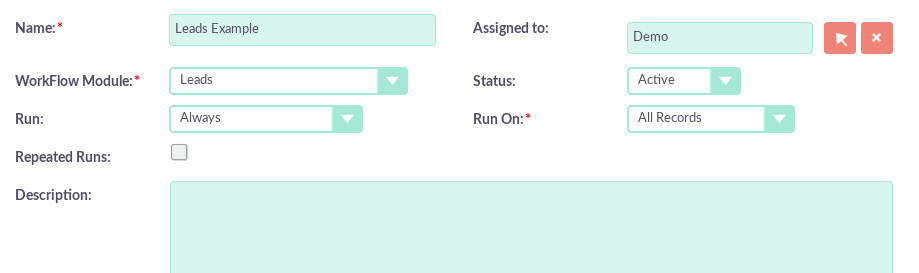
2 – Make a workflow as Assignment and monitoring of leads.
3 – Conductive leaders such as the WorkFlow Module.
4 – Make sure that the repeated executions are NOT selected and that the status is active. You can optionally change Assigned to and add a Description.
Once these steps have been left, the first panel should look like this:
Conditions
1 – Create a new status line by clicking on the ‘Add condition‘ button.
2 – Select ‘name‘ from the Field drop-down menu.
3 – Keep the operator as Equal to and the type as Value
4 – In the Value drop-down menu, select our condition, Website.
Once these have been completed, the Containment panel should look like this:

Behavior
1 – Create a new action by clicking on the Add action button.
2 – Select Modify record in the Select drop-down action list.
3 – Using the Name field, assign a name to the action as Assign to Sales.
4 – Add a field line by clicking the Add field button.
5 – Select Assigned to in the new drop-down box that appears above the Add field button.
6 – Change the drop-down box from the middle of ‘Value‘ to ‘Round Robin‘
7 – Change the third drop-down box of ALL users to ALL the users in the role.
8 – Select from the drop-down box in the Sales line.