Before we start using bDrive we will have to implement it and configure it in our Zimbra, if we have not already done. For this we will first consult the manual How to implement Zimlets to our Zimbra? and then How to configure bDrive in Zimbra?.
Functions of bDrive in Zimbra:
- Sending bDrive attachments.
- Share files through a public link.
- Save e-mails in bDrive.
- Save attachments in bDrive.
- Save documents from the briefcase in bDrive.
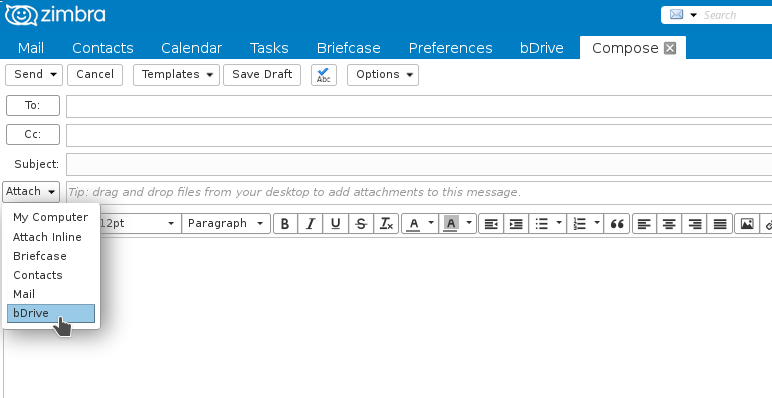
Sending bDrive attachments:
1. When composing an email in Zimbra, we can attach bDrive files directly. To do this we will go, once we are writing the email, to the Attach button, clicking on the arrow on the side in bDrive.
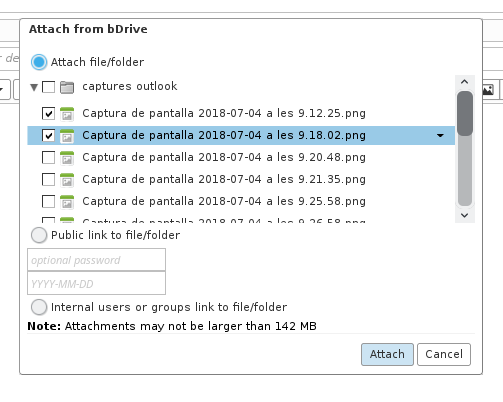
2. A window will open where we will select the file that we wish to attach. We can also attach several files or even entire folders. To do that, we will mark the square that accompanies the file and click on Attach. We also have to make sure that the Attach file/folder option is checked.
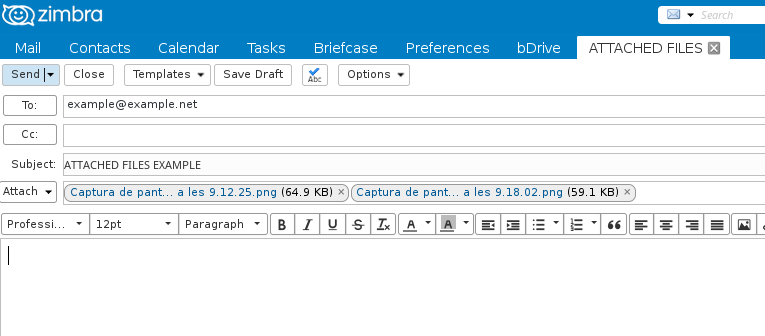
3. Once attached (it may take several minutes depending on the file size), the previously selected files will appear in the Attach bar and the e-mail will be ready to be sent.
Share files through a public link:
Instead of sending files as attachments, we can also share files through a public link. This function will be especially relevant for sending files that are too heavy to be sent by email.
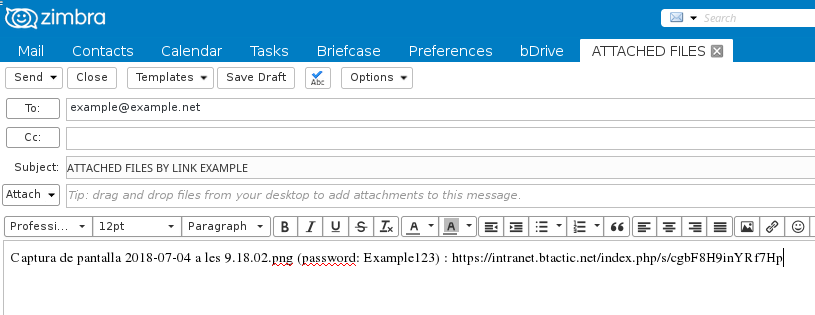
1. To share files through a public link we will go, once we are writing the email, to the Attach button, clicking on the arrow on the side in bDrive.
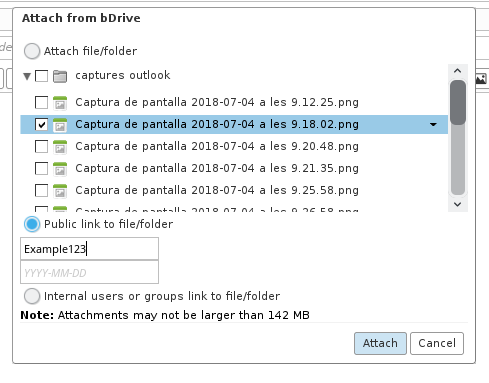
2. A window will open where we will select the file that we wish to attach. We can also attach several files or even entire folders. To do that, we will mark the square that accompanies the file and click on Attach. We also have to make sure that the option Public link to file/folder is checked. We can also optionally add a password that must be entered by the person who receives the file link or also an expiration date.
3. Una vez adjuntados aparecerá como parte del mensaje del e-mail, la información del archivo junto a la contraseña y el enlace que deberá abrir el remitente para ver el archivo. Una vez comprobemos que está todo correcto, el e-mail estará listo para ser enviado.
3. Once attached, the file information will appear as part of the e-mail message, along with the password and the link that the sender must open to view the file. Once we check that everything is correct, the e-mail will be ready to be sent.
Save e-mails in bDrive:
1. We can save the emails, including the attachments to bDrive, by selecting them in the mailbox and dragging them to the bDrive tab in the Zimlets section.
NOTE: We can select several emails by clicking on the squares that accompany them or by pressing and holding the CTRL or SHIFT keys on the keyboard while clicking on the different emails.
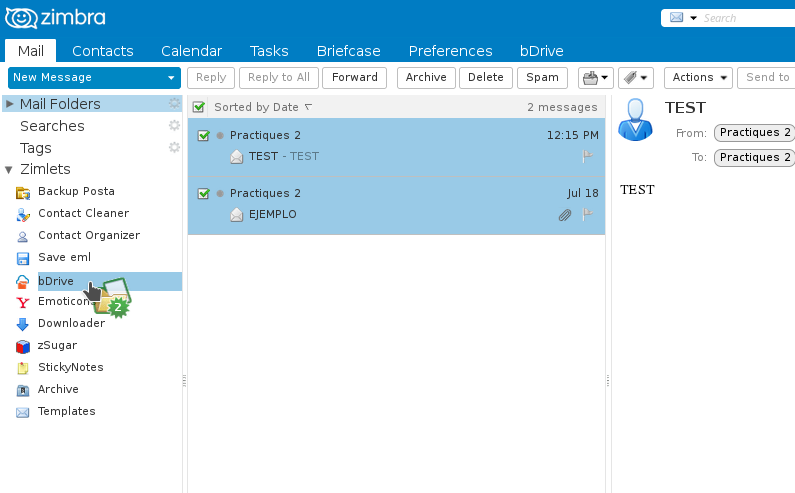
2. Once dragged to our bDrive, we can go to the bDrive tab and visualize them.

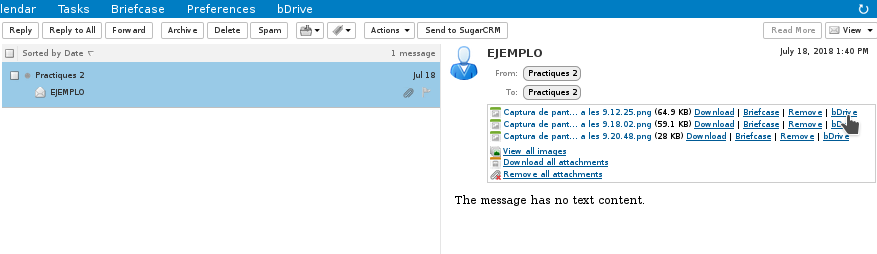
Save attachments in bDrive:
1. We can save an attachment by clicking on the bDrive link that is displayed after each attachment in the emails.
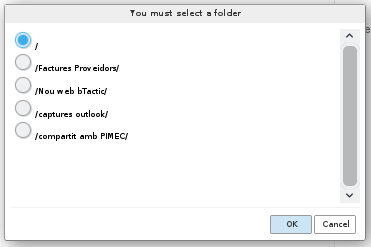
2. Once selected, a window will appear to indicate where we want to save our file. If we want to save it in the main page, we will select the option ”/”.
Save documents from the briefcase in bDrive:
1. We can save documents from the briefcase, selecting them and dragging them to the bDrive tab in the Zimlets section.
NOTE: We can select several documents by clicking on the squares that accompany them or by pressing and holding the CTRL or SHIFT keys on the keyboard while clicking on the different documents.
